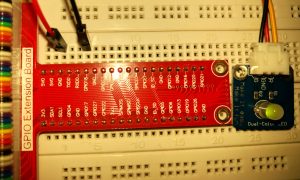
 Today, I want to try to use Node.js on a Raspberry PI to control the GPIO Pins. I will start with the “Hello World” of hardware projects: a blinking LED.
Installing Node.js on a Raspbery Pi is really simple, and is shown here.
Next step is to setup the node project. A very simple way is to use npm init:
mkdir gpio-node-test
cd gpio-node-test
npm init
npm now starts a dialog, where you can enter name, description, keywords, license and some more things. If you are not sure, what to put in, just press enter. npm init will use default values. When finished, the package.json is created automatically. As a next step we need to add the dependencies to use the GPIO pins. I will use the module rpi-gpio for that. There are some more, maybe I will try another one next time. For adding the dependency, npm can help again:
npm install --save rpi-gpio
This command will install the rpi-gpio module in the current folder and automatically add it to the package.json.
Now the project is ready and we can start. We now need the index.js
First of all we need to import the GPIO library:
var gpio = require('rpi-gpio');
The most confusing part using GPIO on the Raspberry PI is the numbering of the pins. There are (at least) 2 ways, how the pins can be named. rpi-gpio uses the board-numbers by default (just numbering the hardware-pins), but in many other cases the BCM numbers. I like the BCM naming more, as there is not so much use to number 3.3 or ground pins, so I will set the numbering schema to BCM. If you want to know more about the numbering you can read this in the Raspberry PI documentation
This is how the pin will be set-up
var LED_PIN = 18; // LED will be on GPIO 18 (BCM numbering)
var led = false; // LED will be off at the beginning
gpio.setMode(gpio.MODE_BCM) // We will use BCM Mode
gpio.setup(LED_PIN, gpio.DIR_OUT, init); // Init GPIO 18 to act as output
When the setup of the pin is ready, the init-function will be called. I use it just to start the timer:
var gpio = require('rpi-gpio');

var LED_PIN = 18;

var led = false;

gpio.setMode(gpio.MODE_BCM)
gpio.setup(LED_PIN, gpio.DIR_OUT, init);

function init() {
    setInterval(blink,1000);
}
The setInterval function calls the method “blink” now every 1000 milliseconds
function blink() {
    gpio.write(LED_PIN, led, function(err) {
        if (err) throw err;
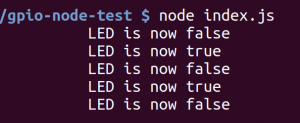
        console.log("LED is now " + led);
        led = !led;
    });
}
Now just start the programm with
node index.js
and enjoy the blinking LED.
Here is the complete code again:
var gpio = require('rpi-gpio');

var LED_PIN = 18;

var led = false;

gpio.setMode(gpio.MODE_BCM)
gpio.setup(LED_PIN, gpio.DIR_OUT, init);

function init() {
    setInterval(blink,1000);
}

function blink() {
    gpio.write(LED_PIN, led, function(err) {
        if (err) throw err;
        console.log("LED is now " + led);
        led = !led;
    });
}

